![]()
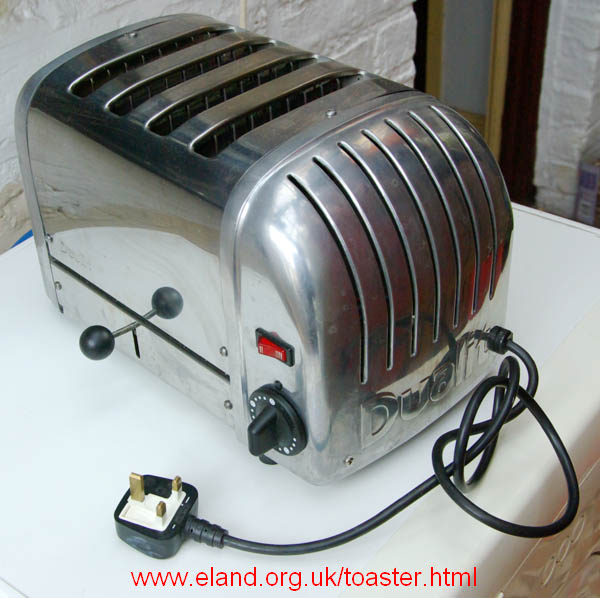
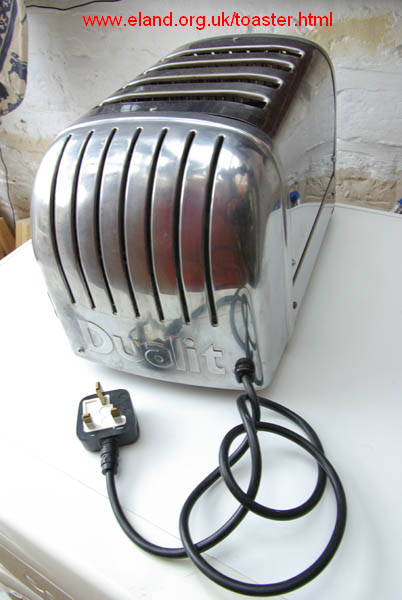
How to replace a Dualit Vario toaster elementDualit Vario toaster element replacement - with pictures!I recently bought a Dualit toaster off eBay, and it had one end element dead. As spare elements are easily available on eBay as well, I bought one but it came without instructions. I couldn't find any on on the Dualit manufacturer's website so decided just to dive in and have a go! And to put this page up to help others. Since then, I've also added a similar page about replacing a Dualit toaster timer. Please note: This is just an account of how I did it. I am NOT a trained Dualit technician. I am NOT an electrician. If you do anything whatsoever to your toaster you do so ENTIRELY AT YOUR OWN RISK. This page is in no way endorsed by Dualit or anyone else. I have no connection whatsoever with Dualit, not even as a customer! If you have the slightest doubt as to your competence then do not do what is described here and instead go to a Dualit service agent or electrician. Right! Disclaimer out of the way, I'm assuming you have one of these, or a similar one:
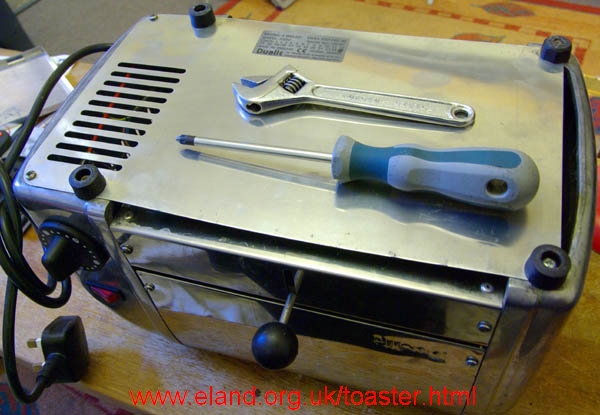
It doesn't really matter much whether it's two, four or six slots, or other detail differences between models. As far as I know all of the Dualit Vario models are pretty similar inside, so just adapt the following instructions to your particular model. You will notice on the picture above that the toaster's plug is nowhere near an electrical socket!. Unplug yours now! Empty the crumb tray, and put it aside. As to tools, you'll need as a minimum a cross-head (ideally Pozi-drive) screwdriver and a spanner. An adjustable as shown here is OK, but if you have a proper non-adjustable set that would be even better.
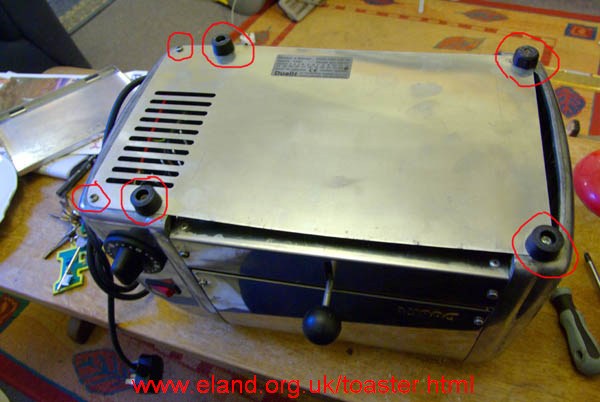
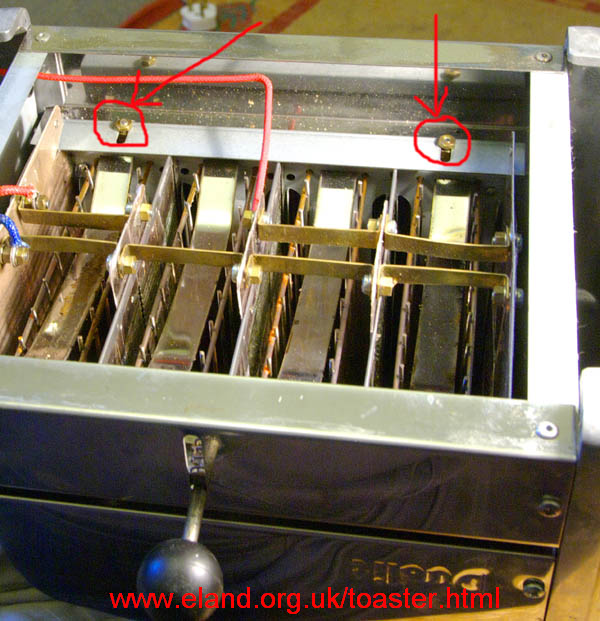
Try to find somewhere well lit and flat. If you put the whole toaster on a cloth that's a good plan to catch the inevitable crumbs, any falling nuts and bolts, and to protect toaster and table from scratches. OK, we're about to start. Have you unplugged the toaster? Do so without fail, at risk of death! Turn the toaster upside down. Now remove the six screws, circled.
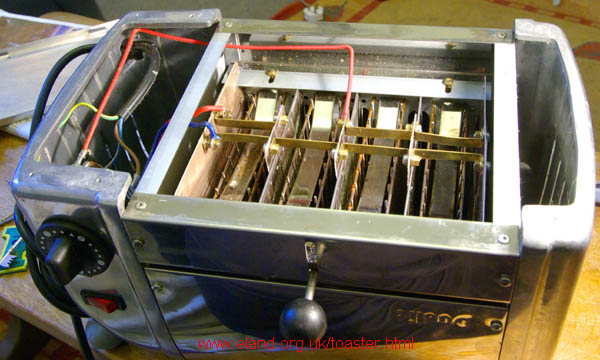
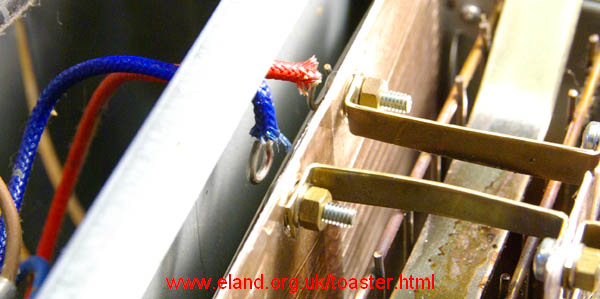
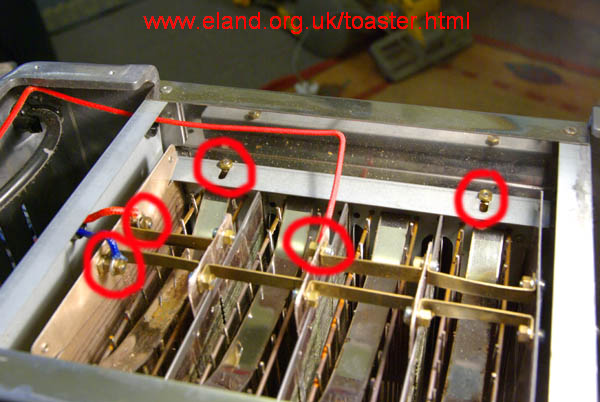
Lift off the cover plate. You'll now see the innards of the toaster. Take a few moments to study it and get an idea what's going on. To the left is the electrical compartment. In it you'll see the mains cable coming in at the back, going to the timer, then wires go from that to the selector switch (for one slice, two slices, four slices etc). From here wires go to the elements, and it's these wires we may have to temporarily disconnect. On my toaster there's just a choice of two slices or four. You'll see there's a blue wire (common) and a red wire for each set of elements which can be switched on. And you'll see the elements are connected, and held, by metal brackets and bolts.
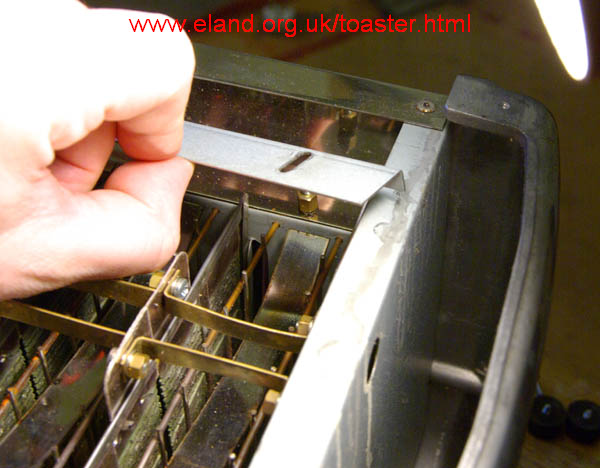
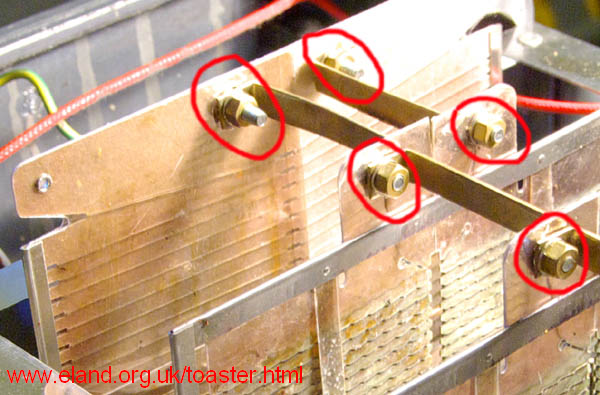
Anyway, on with the disassembly! You'll note that the elements are held in place by a metal plate, which engages with the slot in the edge of each end element, and goes over the end of the middle ones. It's at the top of this next picture, with the two nuts circled. Remove these two nuts now.
This next bit can be fiddly - reach in and remove that metal plate.
Note the orientation of the plate. The little lip is pointing down, and it is towards the back wall of the toaster.
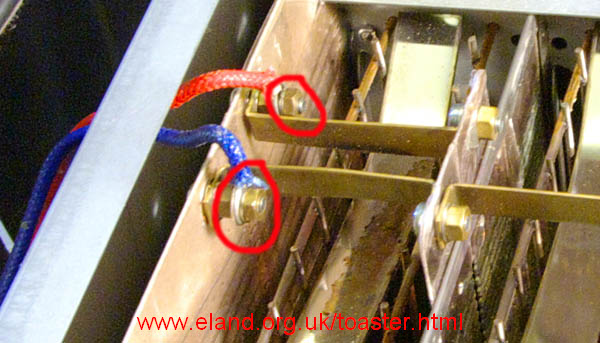
Right, now we need to disconnect the wires before we can get at the bolts to remove the element. Remove the nuts and any washers as circled:
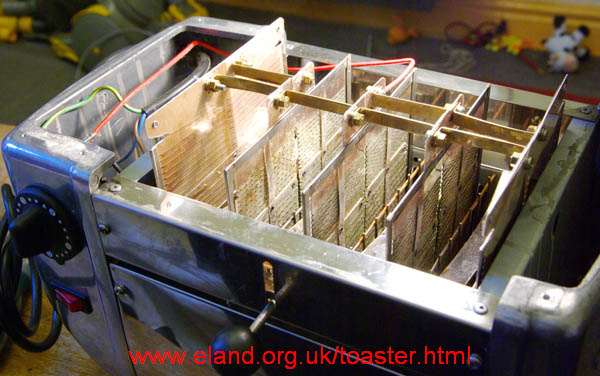
It should now look like this:
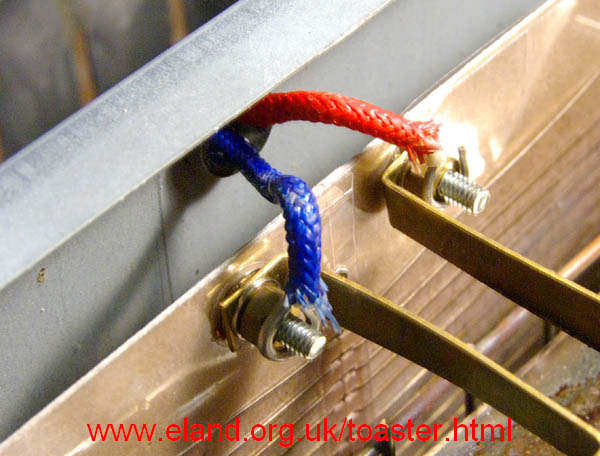
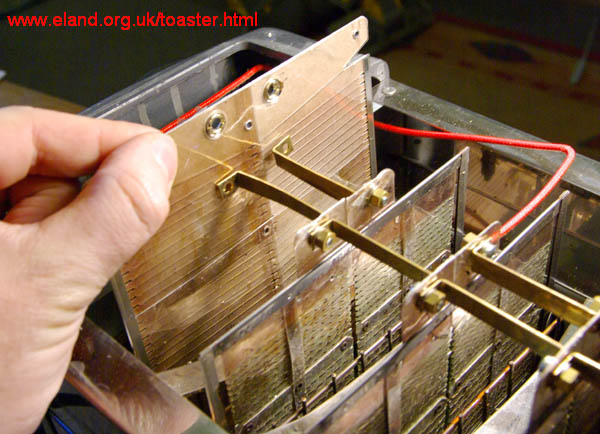
Carefully lift the wires off the screw threads, and move them behind the element, as pictured. This keeps them out of the way when you remove the elements.
You may also need to remove the central wires - if so, just undo the nuts as before. If your toaster is not exactly the same as mine, take a digital photo or make a sketch to make absolutely sure you can re-assemble all of the wires correctly! As you will see, I was just trying to change the end element, so I didn't bother disconnecting the central red wire. It was also long enough to let me do the next bit without straining anything. Now the wires are disconnected, you can lift all of the elements up at once. Do so carefully and slowly - especially if you have left any wires connected. Do not force it. If it won't move, double check for wires. Don't take it all the way out! Just lift it up a few inches so that you can get at the nuts and bolts easily. If you take it all the way out you'll have a fiddly job getting all of the elements lined up in their slots again... On mine there was enough friction between elements and toaster just to hold it in place while I worked:
Depending on which element you need to replace, you'll need to undo the relevant bolts. I've undone the two which secure the end element. Then just pull the element completely out of the toaster:
Put the old element aside, label it with a felt-tip pen, stick it in a bag or something! Chances are it will look identical to the new one, so it's easy to get confused if you don't take care. On mine at least, the dead element looked visually absolutely identical to the new one... Incidentally some elements come with a shiny, plastic-like film covering the actual wire elements - and apparently some older ones don't. I think most modern ones do have this plastic film, and it's actually heat-resistant ceramic or something, not plastic. So don't try to remove it if it's present. Obviously, DO remove all and any outer packaging - just leave the thin shiny sheet right over the wire elements (and just in case, stand ready to switch off in a hurry when you first turn the thing on!). Unfortunately it seems to be almost invisible in most of my pics. Just another close-up to show the bolts. Note that you MUST replace nuts and washers exactly as they were originally. Again, take a digital photo or make a sketch.
OK, almost done:
Now all you have to do is put the bottom plate back on. It's usually best to do the six screws up only very lightly until you get them all in (so that the plate can move slightly to let the screw holes align as you go along - otherwise it can be tricky getting the last few screws in). Then tighten them. Now turn the toaster back over:
You can now plug it in and test your work! |
|